
Goldwing Carburetors Continued.
For some reason people who fix things have a burning desire to modify everything they put a wrench to. I for one and extremely guilty of it, and I am ok with it. Sometimes these desgins actually improve the machines operation, some are astetics, and many make for great storeis of what not to do. Once and a while every mechanic has a true moment of brilliance. What follows here may be one of my best moments.
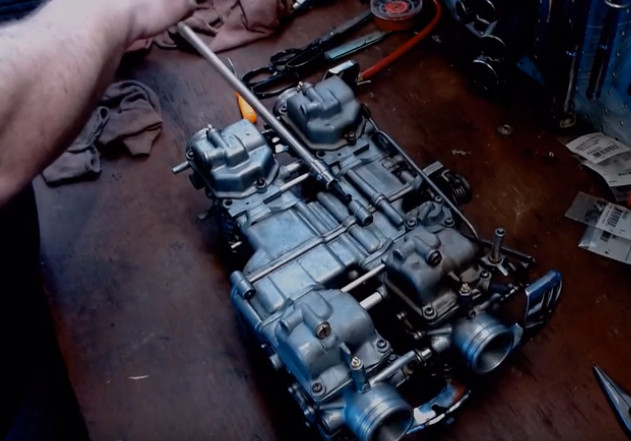
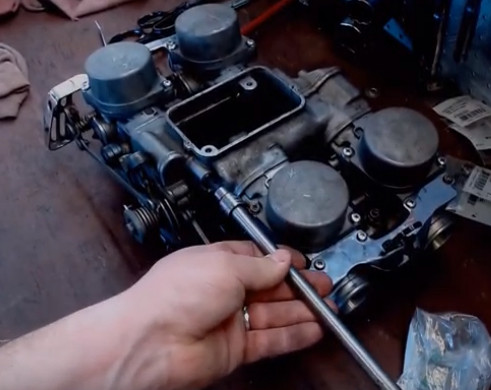
Last month I discussed the reassembly of the GL1100 Goldwing carbs, on the GL1000. Due to the boxer design of this motorcycle and a low clearance frame, these carbs are notoriously hard to remove and reinstall on the engine. When I removed them, I was forced to remove the cap off one of the carbs, and a float bowl on another. Somewhere there is an engineer who owes me a beer for that one. Even as an experienced mechanic, it still took me about 1.5 hours to remove the carbs completely from this engine. Installation would have been the same challenge, but, I had an idea!!
Standard re-installation procedure is to bolt the whole carb assembly together, and slide it in from the side, then attach lines and hoses. I had the idea that if I swapped the screws on the center air box from Phillips to Allen, I could use long ball end Allen sockets and reassemble the airbox on the bike!!! This would make getting the carbs in, 100 times simpler. This also allows me to install the cables and hoses on one half of the carbs before they were fully installed back into the carb space on the bike.
So I took measurements of the sizes of the old screws and stopped by, my local hardware store and bought some Allen screws (aka socket head cap screws) in the appropriate size. I then headed to Skidmark to reinstall it all on the Goldwing.
First I test fitted all the screws with my fingers to make sure I got the correct size. Then I began the install. BTW The install is on my YouTube page. From there I inserted the right half into the carb space on the bike, then hooked the choke and throttle cables up. From there was the moment of truth! With a new airbox gasket installed and held in place with a little grease, and the accelerator passage restrictor in place, I slid the left carbs in, then snapped them together. I used a ball end Allen socket and a super long extension to put in each screw. Alignment was simple and easy. The ball end permitted for the tool misalignment. In ten minutes it was done!!!! Ten Minutes!!!!! Game Changer right there!!!
From there I popped the intakes back on, with new o-rings of course, and then the air box for the air filter. After that I sealed up all the other covers and shields on the bike. With some fresh gas, and a new battery, the Goldwing fired up after only a few cranks! The bike isn’t quite ready for the road yet, because we still need to go over the brakes before it’s safe to ride. But rest assured, it will be killing bugs this summer.
Thanks to the info at goldwingdocs.com for all the help with this bike.
Next month I am doing a review of Cometic Gasket’s Harley Primary Gaskets.
Knoble Moto is a partner of Skidmark Garage. We teach classes for the DIY crowd, on all aspects of motorcycle repair. Entry level maintenance, valve adjustments, carburetor cleaning and tuning, drive line service, suspensions, and even engine work. Our class subjects are updated regularly, so check back often. If there is a subject you do not see covered, shoot me an email at knoblemoto@gmail.com Find us on Facebook at www.facebook.com/knoblemoto, Instagram Knoble_Moto and www.KnobleMoto.com


