
Clutches
Knoble Moto – June 2020
People get really emotional and excited about these things, which is surprising because I have learned that not many people fully understand how they work. Did you ever notice that everyone thinks they are the master at using the clutch, and everyone else who does it differently is wrong? I once had another rider yell to me at a light “you’re going to smoke your clutch riding like that!’ I yelled back, “It’s ok. I can fix that.”
At 52k I decided it was time to replace my clutch. I figured the clutch had to be getting worn out by now. So I picked up a kevlar clutch somewhere online, because Kevlar clutches were supposed to have a long life and stand up to higher torque applications. Since I added a 95” High compression kit and head work over the winter, I figured it couldn’t hurt.
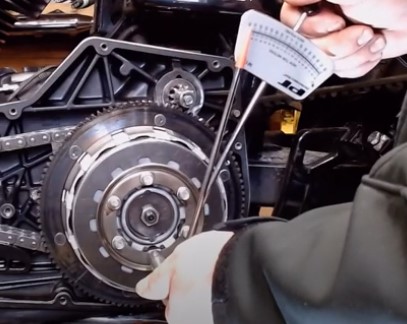
This job does not require any special tools if you are patient and meticulous. I disassembled the primary when I did the primary gasket, featured in last month’s article. First I backed off the adjustment on the clutch cable, just to make sure it doesn’t somehow bind things up during the process. Next there are six bolts that hold the pressure plate on and keep tension on the clutch. These six bolts are under load, so this is where attention to detail is extra important. First, break each bolt free, by ¼ turn. From there, back each bolt off ¼ turn at a time, in a criss cross pattern. This will eventually relieve the spring pressure without risking breaking or stripping the bolts. Take your time at this!
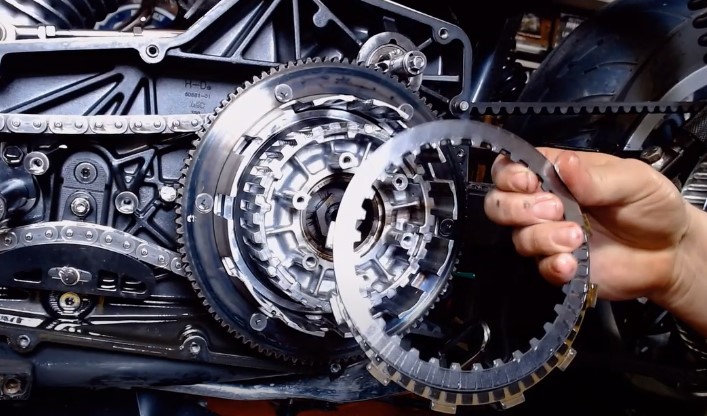
Once you do that, you will be able to remove the entire pressure plate assembly. I then took the friction and steel clutch plates out by sliding them out of the shell with some small screwdrivers. I tried to keep them in order, just in case I found any abnormal damage. I found that the steel plates were blue from heat, so I measured the frictions expecting them to be worn and I would be proud about getting my money’s worth out of those parts. They only had .005” wear on them! They were still good! I was genuinely surprised. See what good lubricants do. (synthetic 75w-140 with friction modifier). But I had already purchased the new clutch and I do a lot of traveling, so I replaced it anyways.
Before I started the project, I took the new friction plates out of the package, and soaked them in 75w-140 gear oil for 24 hours. This way the oil fully permeates the friction material of the new plates. If you do not do this the plates will not be properly lubricated and they will wear out prematurely. This is the same process for the clutches in an automatic transmission. On the center of the plate that the pressure spring pushes on, there is a disk with an Allen screw and nut on it. This is for adjusting the backlash in your clutch linkage. Release this jam nut and back off the screw a little.
This new clutch was a 9 plate disk system, so it required removal of a backing plate and spring a washer from the clutch pack. I also purchased a heavier pressure plate because more spring pressure is always better. *HD Screaming Eagle Pressure plate part number 37807-03. This will give me more clutch pressure without having to buy the high rent clutch assembly. I then installed the backing plate with NEW bolts. Bolt size m6 x 1 metric class 8.8 or higher. Harley part number: 2980
I then reassembled the clutch. Steel disk, friction disk, steel, friction….
I tightened them down in the same criss cross pattern, ¼ turn a time. I then torqued down the new pressure plate to nice and even, and then re-torqued again to be sure. I then set the backlash nut to a light finger tight, the backed it off 1/8 of a turn. Then I held it in place with an Allen wrench, and I locked the assembly down with the jam nut. From there I reassembled the primary and set the clutch cable tension. Check my first article on Thunder Roads Ohio for that info.
Knoble Moto is a partner of Skidmark Garage. We teach classes for the DIY crowd, on all aspects of motorcycle repair. Entry level maintenance, valve adjustments, carburetor cleaning and tuning, drive line service, suspensions, and even engine work. Our class subjects are updated regularly, so check back often. If there is a subject you do not see covered, shoot me an email at knoblemoto@gmail.com Find us on Facebook at www.facebook.com/knoblemoto, Instagram Knoble_Moto and www.KnobleMoto.com


